Trail Script
This scripts paints a texture as the pen objects move across the paper object, it can be use to paint car trails,objects falling, grass been crush, etc.
Examples:
Requires: 3DMax 2008 – 2014
Version: 1.00
Reference
– Maxscript Help file, there is an excellent tutorial on painting.
– Penpal , by Bobo.
Excellent script, that works by projecting the pen from the z axis.
This was an excellent source of information for my script and want to thank Bobo for making the source available.
– TouchTexture, by Philipp Zaufel.
This script also for painting textures works by making a boolean intersection and baking the texture from the result.
I also want to thank Philipp for making the code available as it too was a good source of information.
– James Cleaveland.
James has in his Blog some very interesting information about a script he created, i did use part of his code as a base, which i later modify to meet my needs. Amazing job by James.
Script Information
Open/Save: it lets you open and save the settings in case max scratches. or just for saving diff rent scenarios.
the script will automatically save all settings in the ..Max\plugcfg\Trail.log when pressing the trace it button.
Tracing mode
Ray Intersect:
This is the main mode and the one that has the more futures.
it works by shooting rays from each face and storing the hits position then we paint a dot for each hit, of curse you have control on the number of shoots, distance, etc.
Good: you can paint any shape (tire detail, foot detail, etc) it works on any axis as it shoots were the faces are looking.
Bad: its slow… but sure is faster then doing by hand!
Ray Intersect Center:
this one is base on the previous one but it uses only the center of the object and shoots a single ray straight down the z axis.
Good: very fast, when you can do it with a single dot as paint, use this
Bad: that is a single dot for paint, so if you need to paint an specific shape of the geometry don’t use this.
Boolean Bake:
this is very similar to Philipp’s Touch Texture script, that it works by making a boolean and baking it. i put this mode as i had already the code from other baking script i have.
Good:
Bad: sometimes you get artifacts from Boolean, also since you need an intersection you cant do much to the paint, like changing the size- color base on distance, etc.
Object Occlusion:
It use Mental Ray object occlusion, this its like using the texture bake script.
Mesh Properties
Max Distance Hit: this is an important number, it sets the limit at which the rays will reach, so you don’t send rays all over you scene.
Iterations:by changing this number you are actually subdividing the tracer objects to have more faces so we can have more shooting rays
note: be careful with low numbers as you will end up with lots of rays. look at the info for the number of actual hits.
Use Selected faces: i recommend to use this, so you don’t calculate rays from all your mesh if only the bottom of the shoe is going the hit the surface for example.
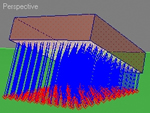
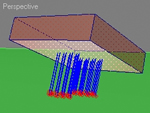
Use Selected Faces:OFF Use Selected Faces:ON
Don’t subdivide: it just turns off the subdivide modifiers

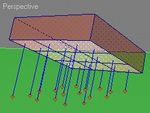
Don´t subdivide:OFF Don´t subdivide:ON
View Vector rays: lets you see the actual rays and hits.
Obj Intersect Paper: when the object intersects the paper object it will not record any hits as RayIntersect doesn’t see backfaces, with this check box ON, you will temporally have double faces so we can record the hits from the other side.
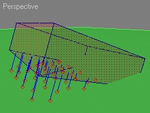
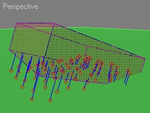
Obj Intersect Paper :OFF Obj Intersect Paper :ON
Brush Settings
Brush Size: size of each paint hit
Invert: it inverts the colors of the paint.
Distance Affects Size: it will change the size of the paint based on the distance of the farthest hit and the actual face.

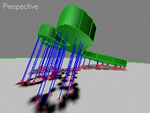
Distance Affects Size :OFF

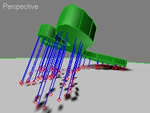
Distance Affects Size :ON
Distance Multiplier: lets you change the size proportionally up or down for the brush radius.
Distance Affects Color: it will change the intensity of the paint based on the distance of the farthest hit and the actual face.

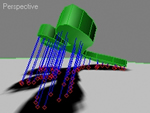
Distance Affects Color:OFF

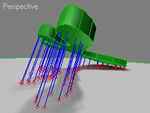
Distance Affects Color :ON
Color Multiplier: lets you change the intensity proportionally up or down for the Brush.
Draw Between hits: it will draw a line from each point to the next one.


Draw Between Hits:OFF Draw Between Hits:ON
Soft Brush: makes the brush Soft.
Fade Painting: it will fade the paint base on the number of frames specified.
![]()
![]()
Fade Painting :OFF Fade Painting :ON
Fade Time: how long will the fade last.
Fade Brush Scale: it will change the brush size each frame.
![]()
![]()
Fade Brush Scale:OFF Fade Brush Scale:ON
Curve: type of falloff curve. Linear, Scale:4, Fade Time:30
 Square, Scale:4, Fade Time:30
 Inverse Square , Scale:4, Fade Time:30
 Inverse Cubic, Scale:4, Fade Time:30
 Sin, Scale:4, Fade Time:30
Render
Path: where you want to save the render it bitmaps.
Bitmap Name: Name of the Render it Bitmaps.
Save map: Saves the bitmaps.
View map painting: opens a dialog and lets you see the map as it been painted.
![]() it will show the bitmap on the mesh when doing previews.
it will show the bitmap on the mesh when doing previews.
Format: tif, jpg, tga, png.
Output size: size of the bitmap.
Animation Range: Range of Frames to render.
From: first frame
to: last frame
Subframe Sampling: it will let you Render sub frames so you don’t get gaps on fast moving objects.
![]()
![]()
![]()
Subframe Sampling: 0 Subframe Sampling: 10 Subframe Sampling: 20
uvw: it will unwrap the object automatically.
Download “Trail”
GTools_Huellas.zip – Downloaded 329 times – 117.24 KB


Leave a reply